
DC 0 200V 100A 300A Voltmeter Ammeter Car Battery Tester Capacity resistance electricity Voltage Meter monitor 12v 24v 48v 96v
- Category: >>>
- Supplier: Sichuan Roncy Technology Co. Ltd.
Share on (11000020163351):
Product Overview
Description
 VR
VR

Products Description

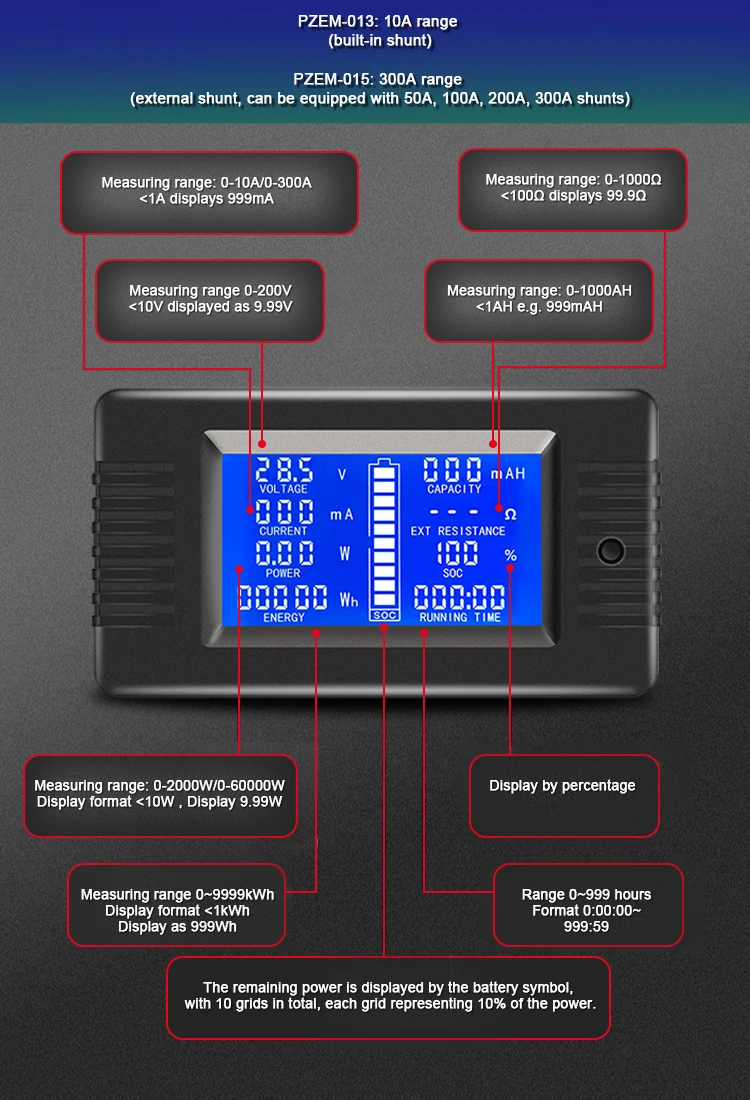
Voltage | ||
Measurement range: 0-200V (<8V requires external power supply) | ||
Display format: <10V display such as: 9.99V | <100V display such as: 99.9V | |
>100V display such as: 199V | Minimum resolution: 0.01V | |
Starting voltage: 0.05V | Measurement accuracy: 1% | |
Current | ||
Measurement range: 0-10A (model: PZEM-013) | ||
0-300A (model: PZEM-015) , can set 50A, 100A, 200A, 300A four ranges Set according to the specifications of the external shunt, the factory default is 100A | ||
Display format: <1A display such as: 999mA | <10A display such as: 9.99A | |
<100A display such as: 99.9A | ≥100A display such as: 199A | |
Minimum resolution: 1mA | ||
Starting current: 10mA (model: PZEM-013) | Starting current: 10mA (model: PZEM-013) | |
Measurement accuracy: 1% | ||
Power Rate | ||
Measurement range: 0-2000W or 0-60000W | ||
Display format: <10W display such as: 9.99W | <100W display such as: 99.9W | |
<1000W display such as: 999W | <10000W display such as: 9.99kW | |
≥10000W display such as: 19.9kw | ||
Minimum resolution: 0.01W | ||
Starting power: 0.1W (model: PZEM-013) | 0.2W (model: PZEM-015) | |
Measurement accuracy: 1% | ||
Impedance | ||
Impedance = voltage/current | Measurement range: 0-1000Ω | |
Display format: <<100Ω display such as: 99.9Ω | ≥100Ω display such as: 999Ω | |
Display when the range is exceeded or the current is 0 | Minimum resolution: 0.1Ω | |
Measurement accuracy: 1% | ||
Capacity | ||
Measurement range: 0-1000AH | ||
Display format:<AH such as: 999mAH | <10AH such as: 9.99AH | |
<100AH such as: 99.9AH | <1000AH such as: 999AH | |
Minimum resolution 1mAH | Measurement accuracy: 1% | |
Note: Battery capacity test is the accumulation process of discharge current against time, which requires a certain amount of time. The specific time is related to the size of the discharge current. Before testing the capacity, you should first pre-set the full charge voltage and cut-off voltage according to the specifications of the battery used, and then perform the discharge test after fully charging. When the full charge is displayed as a blank, it means that the discharge is over. At this time, the capacity display value is the capacity of the battery. | ||
Remaining power | ||
The remaining power is displayed by the battery symbol, with a total of 10 grids, each grid represents 10% power | ||
The remaining power is calculated by the current battery voltage value. Before testing, the full power voltage should be pre-set according to the specifications of the battery used. Cut-off voltage; every voltage = (highest voltage - lowest voltage)/10. | ||
Energy consumption | ||
Measurement range: 0~9999kWh | ||
<1kWh display as: 999Wh | <10 kWh display as: 9.99kWh | |
<100kWh display as: 99.99kwh | <1000kWh display as: 999.99kWh | |
≥1000kWh display as: 9999kWh | Overflow reset | |
Minimum resolution: 1Wh | Measurement accuracy: 1% | |
Note: 1Wh=0.001kWh=0.001kWh | ||
Running time | ||
Range: 0~999 hours (no time counting when no load) | Format: 0:00:00~999:59 (overflow reset) | |
Power consumption | ||
Normal working state: 0.03-1.2W | Sleep state: 05mW-0.5W | |
Power consumption is related to the value of the test voltage. The higher the voltage, the greater the power consumption | ||
Working temperature | ||
20'C~+60'C. | ||

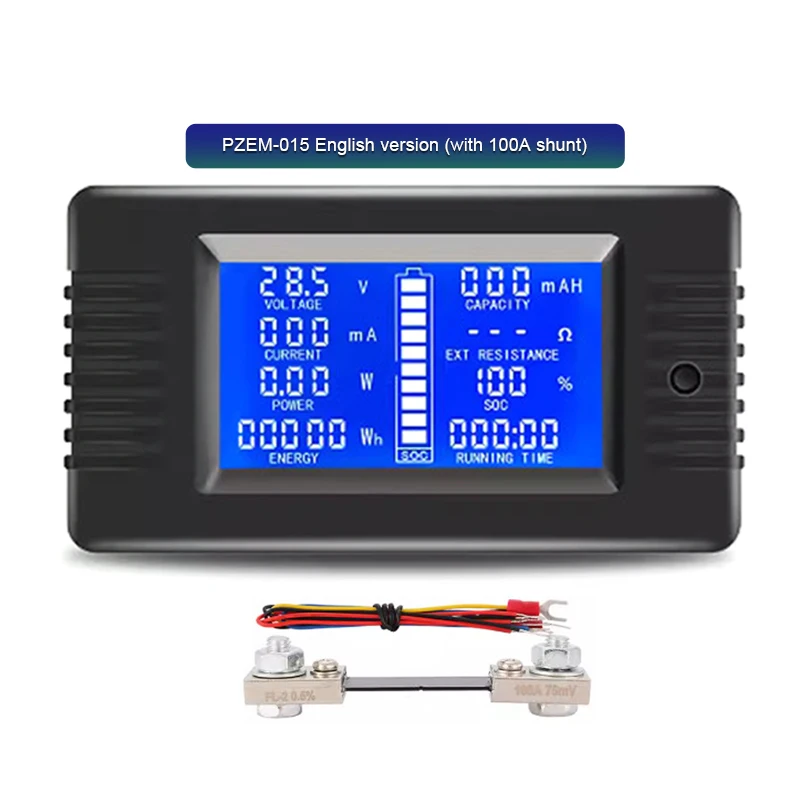
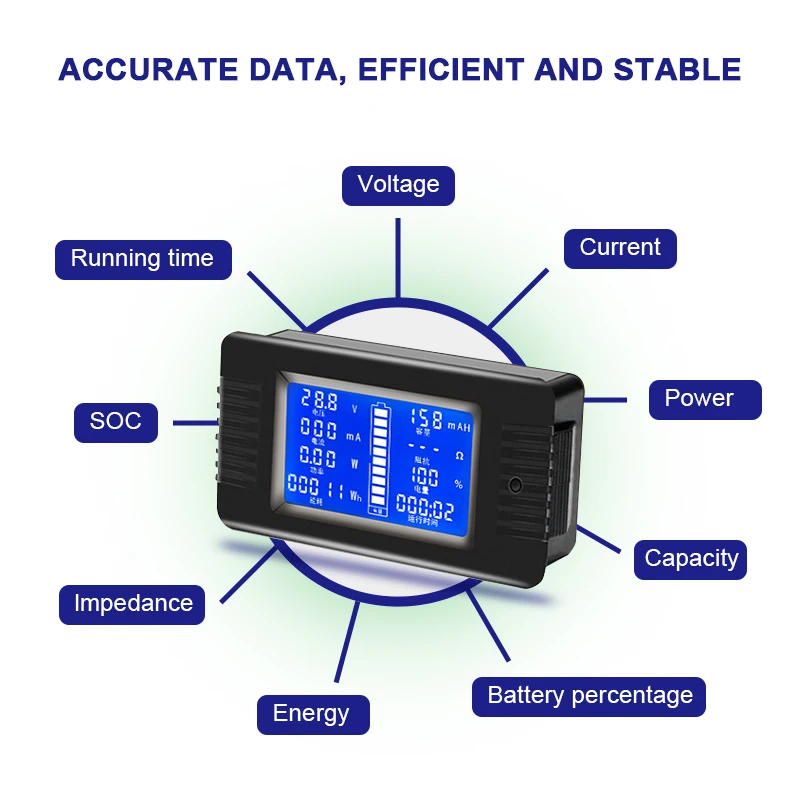
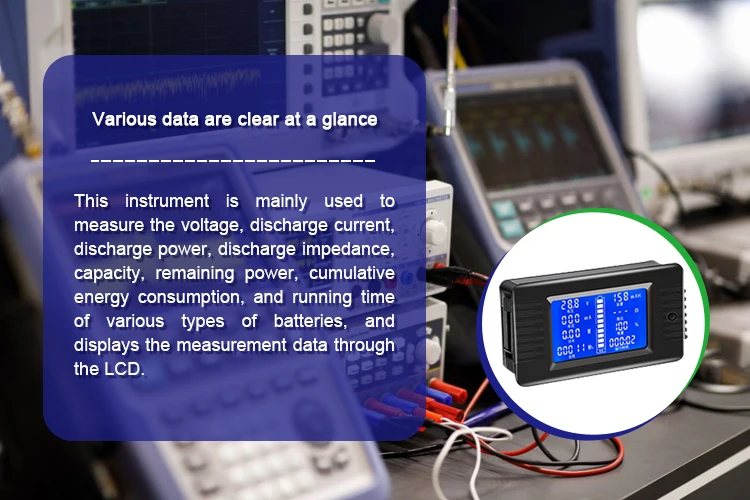
Various data are clear at a glance
This instrument is mainly used to measure the voltage, discharge current, discharge power, discharge impedance,
capacity, remaining power, cumulative energy consumption, and running time of various types of batteries,
and displays the measurement data through the LCD.
capacity, remaining power, cumulative energy consumption, and running time of various types of batteries,
and displays the measurement data through the LCD.

PRESS-TYPE TERMINAL,SCREW-FREE INSTALLATION
NO Screw stripping
NO Screw rusting
NO Lack of tools
NO Time consuming and laborious
NO Screw rusting
NO Lack of tools
NO Time consuming and laborious


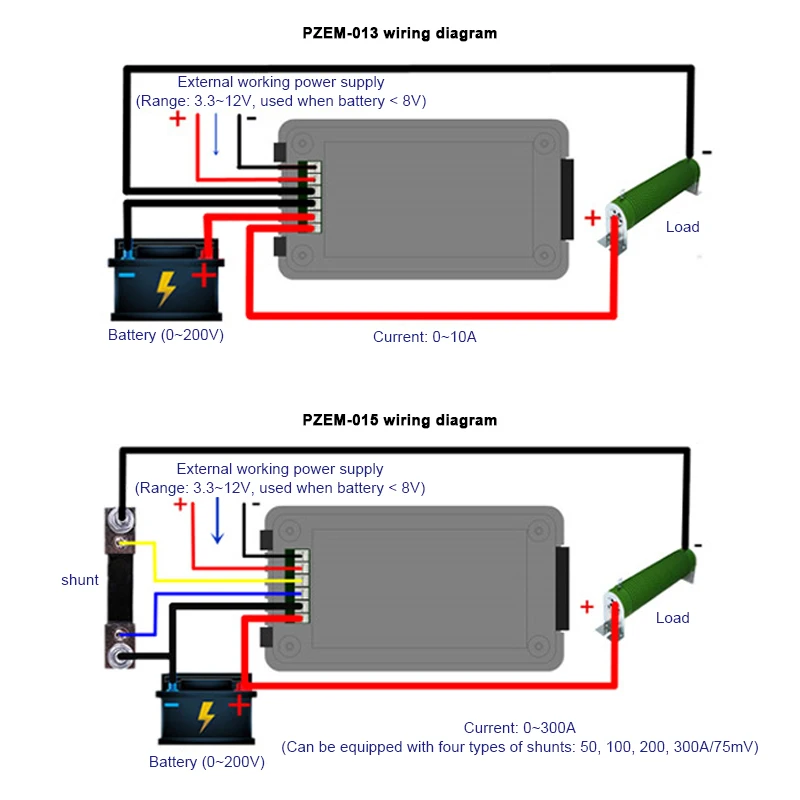
PZEM-013: 10A range (built-in shunt)
PZEM-015: 300A range (extemnal shunt, can be equipped with 50A, 100A, 200A, 300A shunts)
PZEM-015: 300A range (extemnal shunt, can be equipped with 50A, 100A, 200A, 300A shunts)
Notes
This module is suitable for indoor use and cannot be used outdoors
The added load cannot exceed the rated power.
Connect the wires strictly according to the wiring diagram.
This module is suitable for indoor use and cannot be used outdoors
The added load cannot exceed the rated power.
Connect the wires strictly according to the wiring diagram.


Battery full charge/cut-off voltage setting
Full power voltage setting:
Step 1: In the normal display state (Figure 1), long press the button until the LCD displays the
interface of Figure 2, then release the button;
Step 2: The flashing SET character indicates that the current state is the full power/cut-off voltage setting state. Long press the button until the LCD displays the interface shown in Figure 3, then release the button.
Step 3: At this time, the battery symbol shows a full grid of power, indicating the full-charge voltage setting state. The factory default full-charge voltage is 020.0V. The digital flashes from low to high in a cycle, indicating the current digit to be set. Short press the button to set the value. It should be noted that because the full-charge voltage setting value has 4 digits, and the digital has only 3 digits, it is divided into a low digit (Figure 3) + high digit (Figure 4) two-stage setting method. For example: the factory default full-charge voltage is 020.0V, then the display state is 20.0V-020V low and high digits cycle switching display. If you want to set the full-charge voltage to 199.0V, set the low digit to 99.0V. At this time, when it cycles to the high digit, it will display 099V, and only the highest digit 0 flashes to indicate that it can be set. Setting the high digit to 199V means that the full-charge voltage is 199.0V.
Cut-off voltage setting:
Step 1: After the full-charge voltage is set, press and hold the button until the LCD displays the interface in Figure 5, then
release the button;
Step 2: At this time, the battery symbol shows zero power, which indicates the cut-off voltage setting status. The factory default cut-off voltage is 016.0V, and the setting method is the same as above. The cut-off voltage defaults to 0.8 times the full-charge voltage. After setting the full-charge voltage, the cut-off voltage is automatically generated according to the relationship of 0.8 times; otherwise, it can be reset. After all the above settings are completed, press and hold the button until it is saved and exits the setting state to restore the normal display interface.
Current range setting (only for PZEM-015 model)
Step 1: In the normal display state, long press the button until the LCD displays the interface of Figure 2, then release the button, and short press the button again to switch to the interface of Figure 7, indicating that it is currently in the current range setting state;
Step 2: Long press the button until the LCD displays the interface of Figure 8, then release the button and short press again to switch the current range; this instrument provides 4 current ranges, the factory default is 100A; choose the range according to the size of the shunt;
Step 3: After the current range is set, long press the button until it is saved and exits the setting state, and the normal display interface is restored.
Step 3: After the current range is set, long press the button until it is saved and exits the setting state, and the normal display interface is restored.

Company Profile

HKIVI focuses on the R&D, production, and sales of power battery. lt is a brand company built by ACT Group based on many years of experience in the automotive field and battery fields, with the aim of creating a more professional and reliable brand for battery communication, functional safety, and capacity management. The business philosophy of Helping environmental protection" contributes to the development of the electric vehicle industry.
Let's make a better world together.
Certifications


Recommend Products
Exhibition


We Recommend


New Arrivals
New products from manufacturers at wholesale prices