
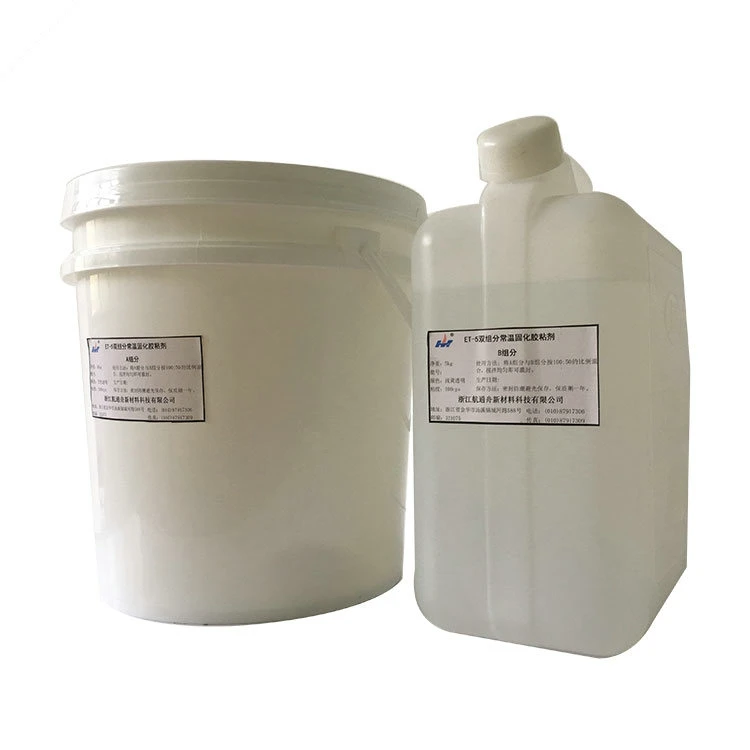
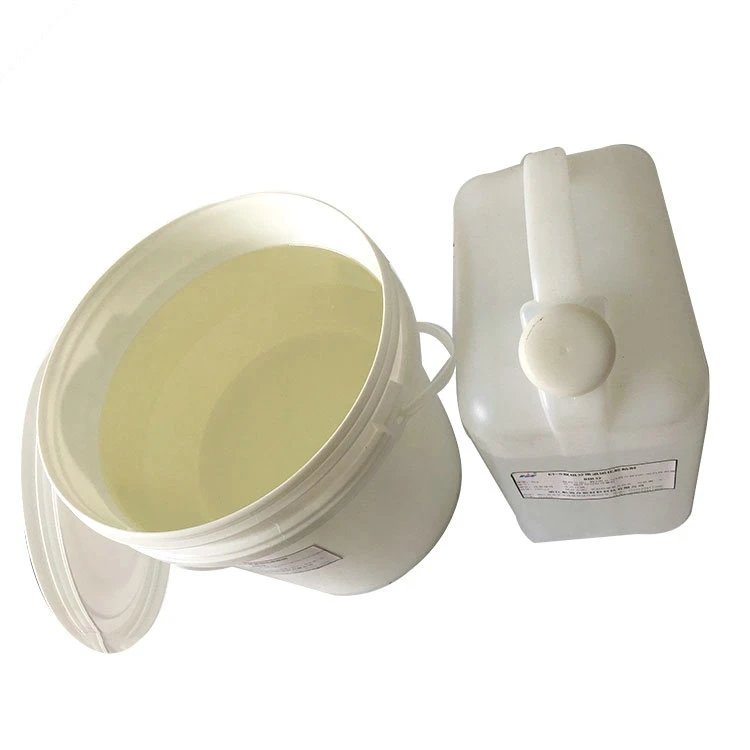
Wood Resin Epoxy For Table Double Components Transparent And Clear Epoxy Resin Hardener For River Table
- Category: >>>
- Supplier: Beijing Hengruida Architectural Technology Co. Ltd.
Share on (1600411304572):
Product Overview
Description
- Packaging Details
- 1.wood box
2.caton box /Palle
3. as your request and suitable for export.
- Port
- Qingdao or any a port
- Lead Time :
Quantity(Kilograms) 1 - 10000 >10000 Est. Time(days) 7 To be negotiated DIY resin river table liquid clear epoxy casting resin table top glue is a high performance double component Clear epoxy system designed for wood table tops, firniture, woodworking, artwork...Epoxy resins come in two parts: resin and hardener.As weight ratio A2:B1 .
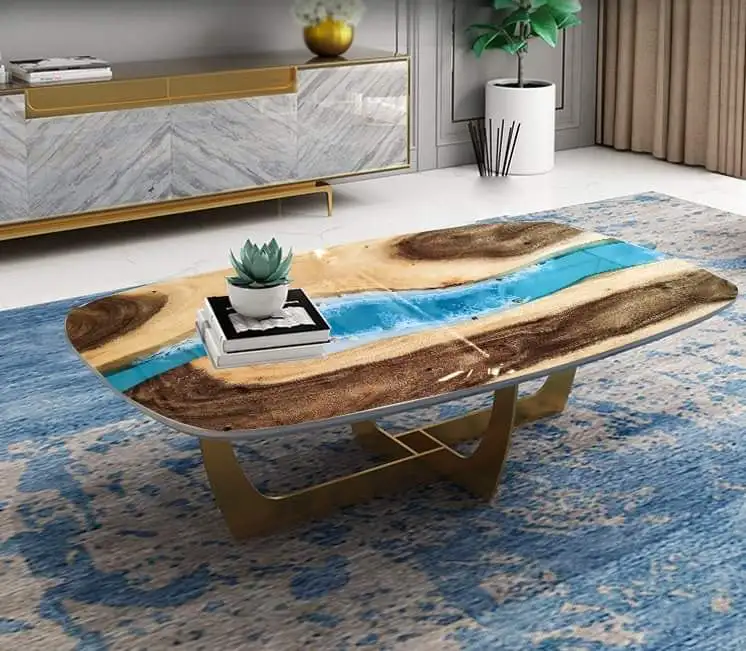
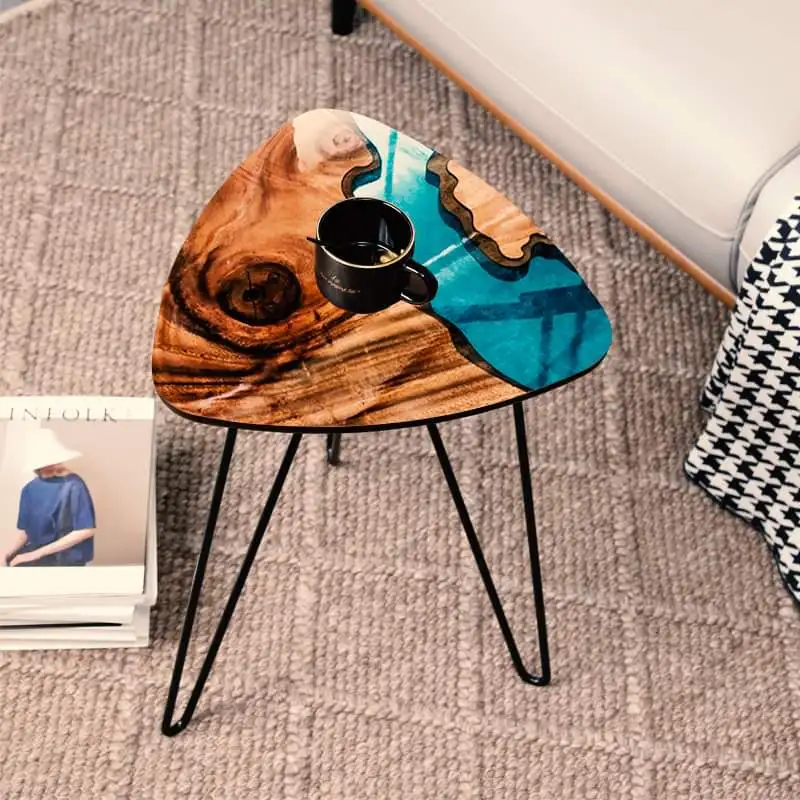
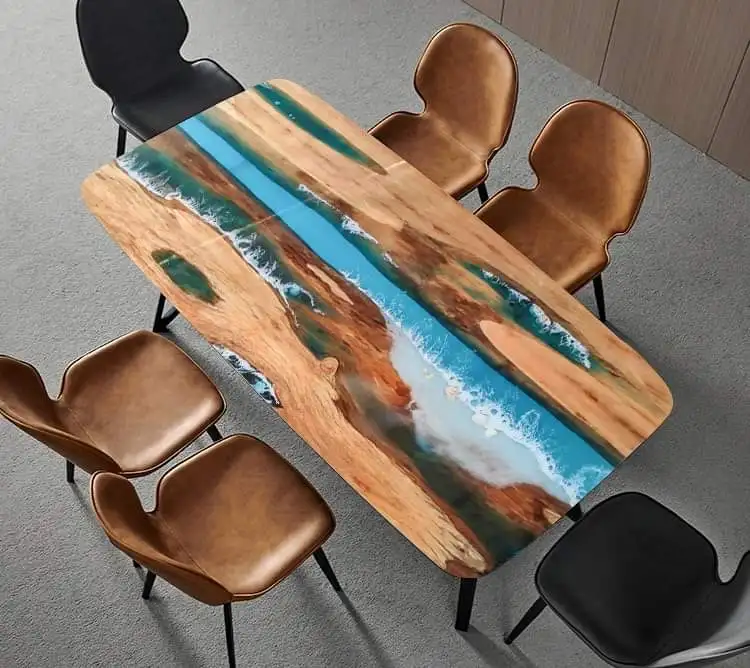
Coffee table river epoxy live edge table epoxy resin glue filling with waterfall
Each board was hanging off about 4 inches on each side, which didn't matter because it didn't fall off.
Next, I measured how wide I wanted the boards and make sure this width was consistent on both ends. I marked the spot with a pencil once each end was parallel.
Then, I cut 2 end pieces of melamine a bit higher than the melamine plus sinker cypress. I attached it to the bottom melamine piece with brad nails.
Next, I verified the table was level with my leveler. Then, I secured the sinker cypress to the melamine with scrap pieces of plywood and a combination of F-clamps and bar clamps.
Mixture and Ratio
I mixed 36 ounces of epoxy resin (24 ounces of A glue and 12 ounces of B glue)
Next, I used a stir stick until the epoxy resin turned cloudy white. It is important to stir the mixture and scrape the sides of the mixing cup. Do NOT whip while stirring because it causes LOTS of bubbles
Two Times Epoxy Resin Pour
To start, I slowly poured the epoxy resin on the surface of the melamine
Next, I removed the bubbles and worked the material with a heat gun. I completely forgot to wipe the table with a tack cloth before pouring the material; therefore, the heat gun blew material in the epoxy resin.
I decided to use my micro butane torch to remove the remaining bubbles.
After 24 hours, I mixed another 24 ounces of epoxy resin and 2 ounces of glow powder for the second pour.
This is the same mixture as the first pour and the same process; however, I didn't use the heat gun this time.
I am comfortable mixing 24 ounces of material in a single mixture due to the size of my container and mixing stick.
Sanding
Normally, I perform sanding at the end of my project. However, I ran out of resin, which is the reason why I sanded at this point in the project.The sandpaper grits I used was 80 grit, 120 grit, and 220 grit.


We Recommend

New Arrivals
New products from manufacturers at wholesale prices