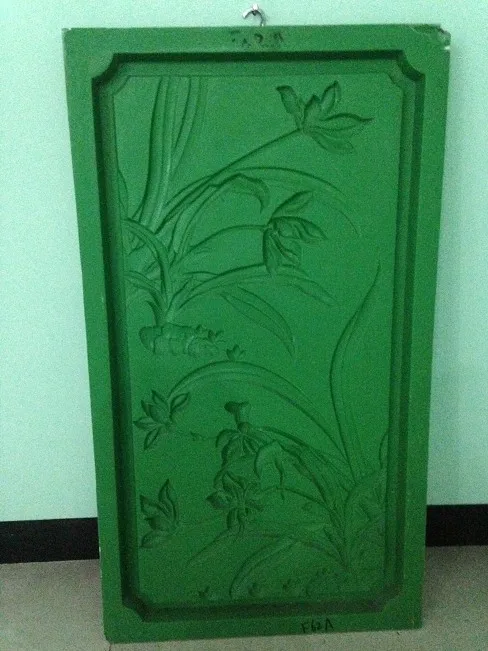
tile mold for making plaster tiles (beautiful building materials)
- Category: >>>
- Supplier: Guangzhou Xingyang Decoration Materials Co. Ltd.
Share on (1759852125):
Product Overview
Description
Advantages
1. direct manufacturer, competitive price.
2. high strength, flat and smooth.
3. clean and clear flower patterns.
4. easy to make gypsum cornices
5. carved degree: 12 mm carved, excellent visual effect.
6. different designs include plain moulds and carved moulds.
Product Details
1. price: us$20-80 / pc, factory price.
2. usage life: 20,000 times for making gypsum mouldings.
3. function: for making gypsum mouldings.
4. supply ability: 50,000 pcs / Month.
5. minimum order quantity: 50 pcs in total.
6. designs: more than 1000 kinds of patterns for your choice.
Specification
1. cornice: 2400~2500mm*90~140mm*5~13mm
2. corner: 400~800mm*400~800mm*5~13mm
3. round cornice: 1000~2700mm diameter
4. flat line: 1500~2400mm*90~130mm*5~12mm
5. medallion: 400~2000mm diameter
6. roman pillar: 2400~2800mm*150~400mm diameter
Trade Infomation
1. delivery time: 20-30 days.
2. shipment port: Guangzhou, China.
3. loading: 600-1000 pcs for a 20 ft container.
4. inner packing: pearl cotton, outer packing: wooden crate.
5. terms of payment: 30% deposit and balance before shipment.
Process of gypsum cornice production by using fiberglass mold
materials should be prepared in advance:
fiberglass mold, scraper, worktable, water, glass fiber, gypsum powder, release oil, brush, shovel, agitation barrel (with volume of 11 liters), plastic rope
6 steps to make gypsum cornice by using fiberglass mold:
Step1 :brush release oil
brush release oil on mold gently.
Step 2: pour gypsum slurry
In order to obtain the best gypsum cornice with smooth surface, it needs to touch the mold back and forth for several times while pouring slurry for the first time.
Step 3: spread glass fiber
Wash hands clean and then grab some glass fiber to spread on the mold evenly. After that, press glass fiber with slurry pouring on them and flatten the surface. Trim glass fiber in order to make them all be put on the centre of mold.
Step 4: tie a rope
Tie up a pinch of glass fiber with a rope on the end of mold and then flatten the surface with a scraper. Wash the scraper clean after that.
Step 5: shovel plaster off the edge of mold
When shovel plaster off the edge of mold, the angel between wrist and the side of mold should be 45 degrees.
Step 6: release gypsum cornice from mold
After 30 minutes later, hold the rope with one hand and carry one side of cornice with the other hand to pull up gypsum cornice from mold. Finally, gypsum cornice production is finished.


We Recommend

New Arrivals
New products from manufacturers at wholesale prices