steam heating pad for container flexitank
- Category: Flexitanks >>>
- Supplier: Qingdao LET Flexitank Co. Ltd.
Share on (685712975):
Product Overview
Description
Qingdao LET Flexitank Co.,Ltd is a professional manufacturer of Flexitanks.
Electrical Heating pad for Flexitank
1.150x5.500m(general)
2X1200mmX5500mm specialized for 20’ container
NOTICE:
1. Output control temperature: 50°C, 55°C, 60 °C
2. Output protection temperature: 80°C
3. No heating during bulk liquid transporting.
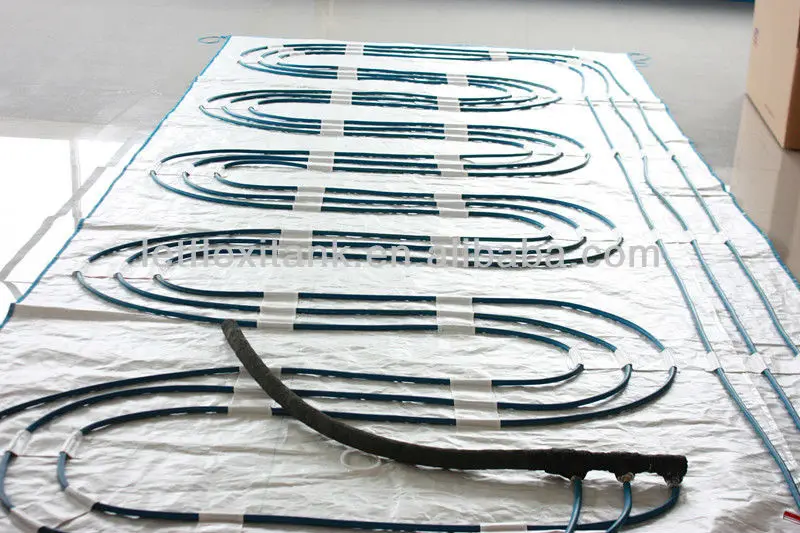
Steam Heating pad for Flexitank
Material: EPDM+ caoutchouc
Working pressure: < 0.2 Mpa
Temperature range: < 220°C
Heat source: Steam
Layout dimension: 5.7 m(length) X 2.3 m(width)
Weight: 30kg
Flexitank Type
Top load&Top discharge(TT)
Bottom load&Bottom discharge(BB)
Top Load&Bottom discharge(TB)
Fleixtank Composition
3"butterfly valve
4 layer PE film
1 layer PP woven fabric
Flexitank Accessories
1. Steel bar---2450*277*65mm 5PCS/set
2. Bulkhead---2330*1680*20mm 1PC/set
3. Corrugated paper---1400*300 (diameter) 1roll/set
4. Heating pad---avoid solidifying and keep flowing (optional)
5. Air vent---release air (optional)
Flexitank Advantages
1. Low costs--saving storage, freight, cleaning and labor cost;
2. Large capacity--contain 24,000 liters liquid at most, 35%more than drums or bottles;
3. Convenient--Easy to operate and transport;
4. Environment friendly---food-grade and degradable.
Pics for your reference
electrical heating pad

Steam heating pad

flexitank with and without bulk liquids

Flexitank Installation Procedure
Installation procedure | Pictures |
1, Choose a better container, check strictly and clean the inner flints. |
|
2, Lay the corrugated paper in three sides and the bottom of the container to avoid bareness. |
|
3, Take out of the flexitank and paper pipes from the packaging box. |
|
4, Fix the steel bar using the paper pipes. |
|
5, Install and tie the bulkhead& steel bar together with a fixed rope. |
|
6, Pave the flexitank and secure it by suspending the four corners while opening the valve cap. |
|
7, Fix the valve cap properly. |
|
8, Close the left door and make sure the foam strip doesn’t exceed. |
|
9, Connect the valve with the pipe and set them, open the valve to charge the liquid. |
|
10, When the loading is finished, close the valve first and then disconnect the pipe and screw the valve cap on. |
|
We Recommend

Hot sale Food grade 24000L flexitank bag for transport wine oil Juice
US $200.00-$225.00

Flexitank 24000 liters bulk liquids container flexibags
US $120.00-$250.00

20FT Container Flexitank for Bulk Liquids Transport
US $120.00-$250.00


New Arrivals
New products from manufacturers at wholesale prices