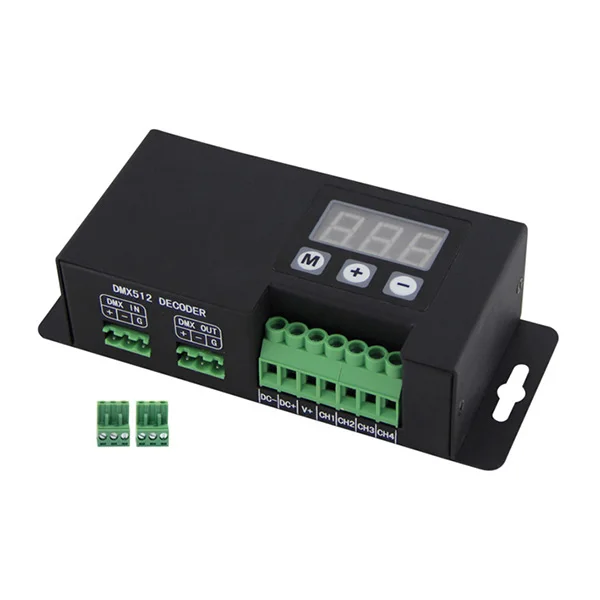
BC-854 RGBW 512 DMX декодер DMX512 DC12V 24V 48V 6A 4 канала
2 965,22-3 558,26 ₽
Сохранить в закладки 60318019488:
1.1 What is included
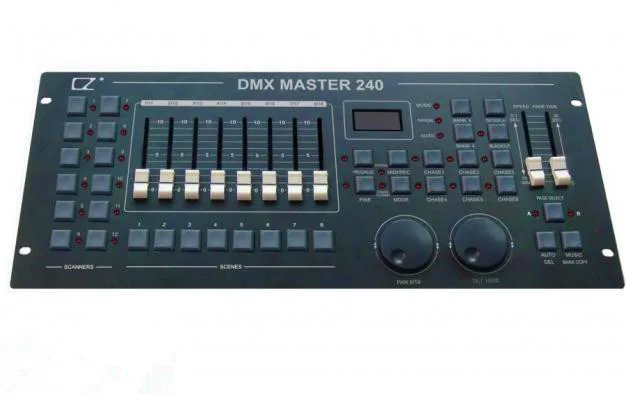
1) DMX-240A controller
2) DC 9-12V 500mA, 90V~240V Power Adapter
3) Manual with warranty card
1.2 Unpacking Instructions
Immediately upon receiving a fixture, carefully unpack the carton, check the contents to ensure that
all parts are present, and have been received in good condition. Notify the shipper immediately and
retain packing material for inspection if any parts appear damaged from shipping or the carton itself
shows signs of mishandling. Save the carton and all packing materials. In the event that a fixture
must be returned to the factory, it is important that the fixture be returned in the original factory box and packing.
* Please keep this User Guide for future consultation. If you sell the unit to another user, be sure that
they also receive this instruction booklet.
* Always make sure that you are connecting to the proper voltage and that the line voltage you are connecting to is not higher than that stated on decal or rear panel of the fixture.
* This product is intended for indoor use only!
* To prevent risk of fire or shock, do not expose fixture to rain or moisture. Make sure there are no flammable materials close to the unit while operating.
* The unit must be installed in a location with adequate ventilation, at least 50cm from adjacent surfaces. Be sure that no ventilation slots are blocked.
* Always disconnect from power source beforeservicing or replacing lamp or fuse and be sure to replace with same lamp source.
* In the event of serious operating problem, stop using the unit immediately. Never try to repair the unit by yourself. Repairs carried out by unskilled people can lead to damage or malfunction. Please
contact the nearest authorized technical assistance center. Always use the same type spare parts.
* Don t connect the device to a dimmer pack.
* Make sure power cord is never crimped or damaged.
* Never disconnect power cord by pulling or tugging on the cord.
* Do not operate this device under 113 F ambient temperature conditions.
Note:
Waterproof moisture-proof, Please cut off the power before the power on, In order to using proper and safety the equipment, please read this manual carefully before you using. Removed from the packaging, such as checking that there is in transit damage, please contact the dealer.
2. Operating Instructions:
This device is a DMX controller, it can receive DMX signals. The Equipment is DC 9-12 V, minimum current 300mA, and only for indoor use.
Do not over-vibration of the equipment, the installation process to avoid the violent collision.
When installation the equipment, make sure the equipment is not in high temperature, not in high humidity or not in high dust environments.
Be sure to read this manual and become familiar with some features of this device after using, it will avoid unwanted consequences.
If this device need to be transported, it is best to use the original packaging.
For security reasons, it is best not to make unauthorized changes to this equipment.
3. Features:
With rocker and wheel DMX console
A total of 240 control channels to control 12 lights, each light up to 20 channels.
DMX 240 uses a joystick control;
Pressing “Fine” key, you can achieve horizontal and vertical movement of micro-step.
It can be programmed 6 chase, each chase can include 240-step scene.
It can be programmed 30 Bank (program), each Bank (program) can be saved eight scene.
Scene, procedures, chasing can be copied..
Blackout function
through the built-in microphone or audio input interface, can achieve a voice.
4. Front Board:

5. Back Board:

1. Selection button
2. Selection Indicator
3. Scene selection buttons
4. Channel faders, used to adjust DMX value, the channel 1-8 can be directly controlled the choice light, channels 9-16 can be achieved by pressing the page button later.
5. Smoke machine button, used to trigger the smoke machine.
6. Smoke machine heat indicator
7. Smoke machine ready indicator
8. Page A light
9. Page B light
10. Page selection (manual mode), press this button, you can switch between pages A and B, or two are selected.
11. Programming button
12. Music / program to copy button, when you press this button, the controller is in voice mode.
13. Display window
14. Controller Operation Mode Indicator (music / manual / automatic).
15. Procedure page up button.
16. Program page down button.
17. Select Display button
18. Blackout button
19.MIDI / Record button
20. Specified LED indication
21. Auto / Remove button
22. chase program selection button
23. Speed Putter
24. fade time settings putter
25. microstep settings button
26. chase program combines LED
27. Rocker
27A. horizontal motion runner
27B. vertical motion runner
28. Mode button
29. audio input
30.MIDI input interface
31.DMX polarity switch
32.DMX output interface
33.DMX input interface
34. Smoke machine Interface
35. DC power input connector
36. Power Switch
6. Voice
Console through the built-in microphone or audio input port to achieve voice, it came out from the signal mixer connected to the rear panel of the RCA interface, input sensitivity of 0.1V-1V.
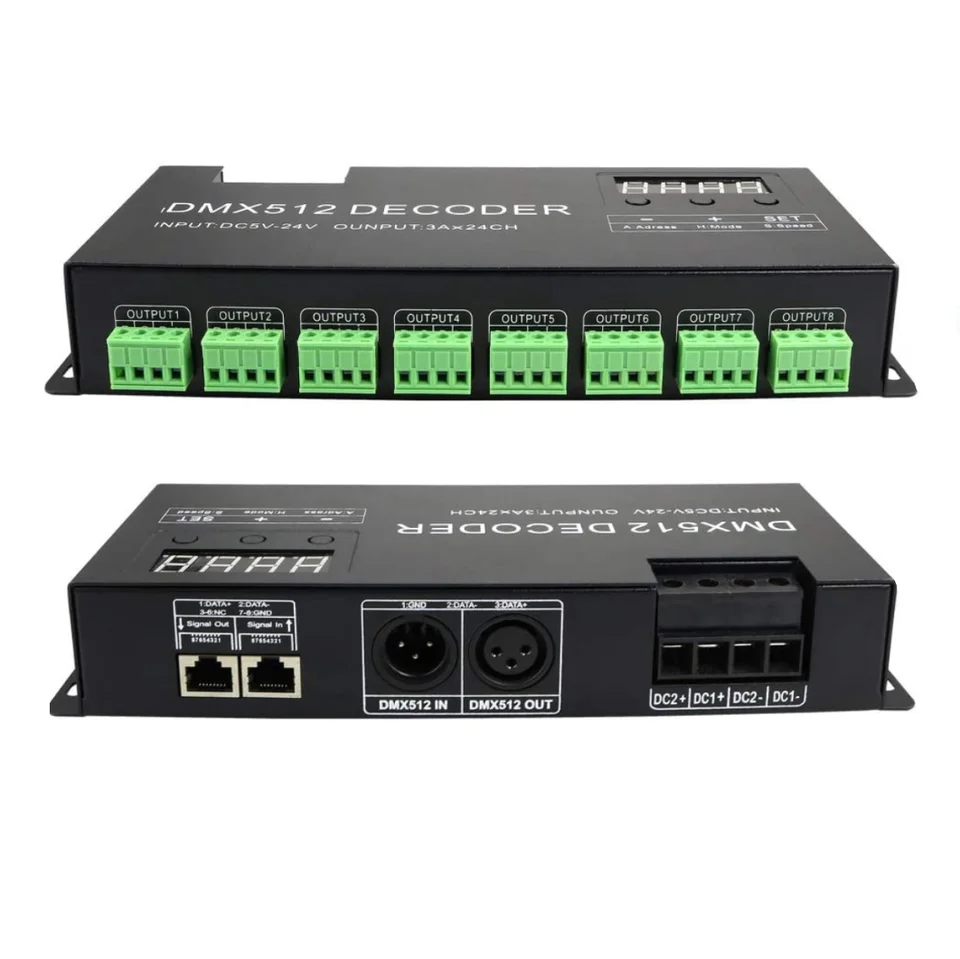
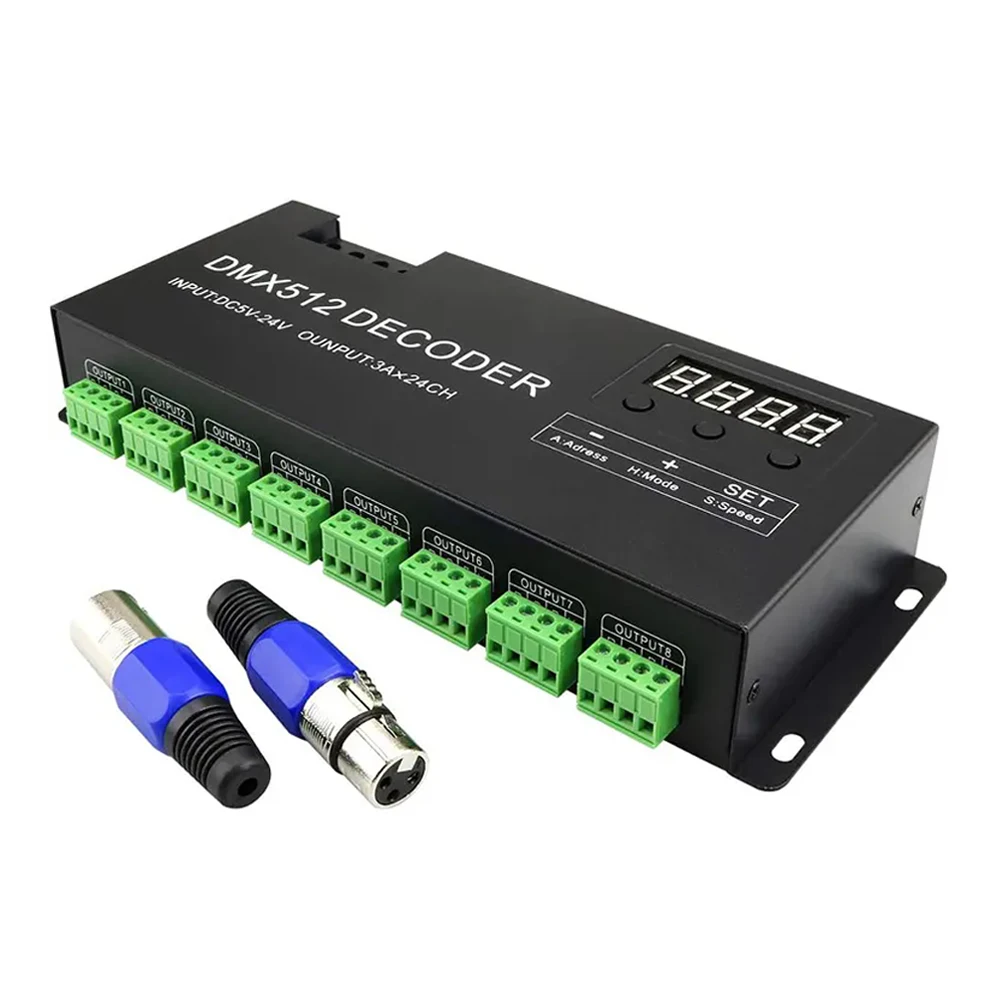
7. DMX512 Connection
Use shielded cable , 3PXLR plugs and connectors to connect controller and lighting & light fixtures and lamps.
Note: DMX signal lines do not overlap each other, in order to avoid lights not working properly.
You can toggle DMX polarity switch to change the polarity of the XLR connectors. DMX control station will output the recent dimming and DMX input port connected to Taiwan, but also to the DMX output of each lamp and the next lamp connected to DMX input.
Reminder: In the last fixture, DMX signal cable should be terminated with a terminator, a 120. 3PXLR resistance welded to a plug signal line and the signal is negative between the lines, then the plug inserted in the final DMX signal output lamps.
8. Lamps Address settings
You should set each light fixtures relative start address, to avoid conflicts on the specified channel with the same starting address of the lamp will be at the same time action. The beginning of the stage lighting control addresses the following table:
Lamp Number | Start Address | Lamp Number | Start Address | Lamp Number | Start Address |
1 | 1 | 5 | 81 | 9 | 161 |
2 | 21 | 6 | 101 | 10 | 181 |
3 | 41 | 7 | 121 | 11 | 201 |
4 | 61 | 8 | 141 | 12 | 221 |
9. Lighting channel settings
This console can control 12 lamps, each lamp lighting up to 20 channels. Each light fixture can be directly before the 8 channels 8 through the panel potentiometer control, after the 8 channels can press the page button, the page indication LED "A" off, "B" light up, then push Potentiometer can control the lamp after the 8 channels.
If the lamp more than 16 channels, you can set the channel as follows:
(1) Press the "PROGRAM" key until the indicator light flashes next to it.
(2) Press the "FINE MODE" key, press twice, and then "ASSIGN" be lit.
(3) Click "SCANNERS" under the number keys to select a lamp.
(4) to promote the "FADE TIME" potentiometer, pay attention to the screen changes, transferred to display "X" or "Y". Dial or the joystick left and right on behalf of the "X" and "Y" direction.
(5) to promote the "SPEED" setting potentiometer to the dial you want transferred to the channel, for example, channel 9 or 10.
(6) To set the channel to dial 19 or 20, the first page to the B page, and then repeat steps 4 and 5.
(7) The setup is complete, press "MID / REC" to save, all the LED will flash about, and finally press the "FINE MODE" key to exit, "ASSIGN" light is off, all the LED will flash it. For example: to promote the "FADE TIME" potentiometer adjustment to the "X", to promote the "SPEED" potentiometer to channel 9, so that settings are saved, the selected channel will be the ninth light from the "PAN" dial or joystick "X" direction control. If the "FADE TIME" potentiometer adjustment to the "1" to promote the "SPEED" potentiometer to channel 9, so that the lamp is selected by a 9-channel console A page will be the first potentiometer to control. If the "FADE TIME" potentiometer adjustment to the "X", to promote the "SPEED" potentiometer to channel 1, so that the first channel will be selected by the lamps "PAN" dial or joystick of the "X" to control the direction of .
-
10. Sliding time specified:
This feature allows you to set the sliding time is the only level of control vertical movement, or control of all channels, especially in light of the lens or shaking scanning X-or Y-axis lights need to slow with sliding, and need to quickly change the pattern or color, this function Is particularly useful.
First console off, then hold down the "MODE" and "TAP / DISPLAY" key, then open the console, this time pay attention to the screen when the screen showed "ALL CH" or "ONLY X / Y" when Release the "MODE" and "TAP / DISPLAY" key, then press "TAP / DISPLAY" key, the screen will display "ALL CH" or "ONLY X / Y" to switch between, the former said the sliding control All channels, which means that only control the "X" or "Y" channel, set up after the first pressing "MODE" key, then press the "TAP / DISPLAY" button, so you save the settings made. All lights will flash.
11. Manual control:
To select the manual mode, press the "AUTO / DEL" button until the MANUAL indicator lights. In manual mode (PROGRAM light is off), you can manually connect to the call control table lamps, and then through the channel fader to control the lamps.
Check a BANK (library) or SCENE (King): by pressing the BANK ↑ or BANK ↓ key to select you want to check the BANK (library), and then SCENES following number keys to select you want to check the SCENE (King).
Check a CHASE (chase): Press the CHASE button on the panel (1-6) to select you want to check the CHASE, and then press the "TAP-DISPLAY", the screen will show you the steps CHASE selected, press BANK ↑ or BANK ↓ keys to flip each step.
Page, select the button: The "PAGE SELECT A / B" button, you can adjust the control channel 1-8 (A indicator light), or control channel 9-16 (B indicator light), or two channels at the same time the corresponding control (A, B two lights are lit).
Display button: by pressing the "TAP / DISPLAY" button to the channel fader potentiometer value from DMX values (0-255) into a percentage (0-100%).
-
12. Programming:
A program (BANK) is a sequence of different landscape composition, the King will be called one by one, the console can edit 30 set of programs (BANK), each program (BANK) 8 King can be stored (SCENE).
12.1 Editing a program
(1) Press "PROGRAM" button about 2 seconds, the corresponding indicator light will flash, noted that "BLACKOUT" (black) light is blinking, click it off, this time into programming mode.
(2) Click "SCANNERS" under the number keys to select lamps.
(3) to promote the channel fader to adjust to the desired effect.
(4) Press the "MIDI / REC" button, ready to save.
(5) Press BANK ↑ or BANK ↓ key to select when you want to store prospects BANK (1-30).
(6) Click "SCENES" following the number keys to save the current view this step. All lights will flash it.
(7) Select the other fixtures, repeat the above steps to complete the other King of the editor.
(8) Finally, press and hold "PROGRAM" button about 2 seconds until "PROGRAM" indicator goes off, exit the program.
12.2 to run a program
(1) Press BANK ↑ or BANK ↓ key to select the BANK (program).
(2) Press "AUTO DEL" key, so that "AUTO" indicator lights to indicate to automatically run the program.
(3) adjust the "SPPED" potentiometer set-up process speed, and then adjust the "FADE TIME" potentiometer setting sliding time, pay attention to let the "SPEED" potentiometer longer than "FADE TIME" potentiometer time. On the other hand, you can also press the "TAP DISPLAY" key twice to adjust program speed, two buttons on the relationship between time interval to run speed.
12.3 A program check
Press the "PROGRAM" button for two seconds to enter programming mode, press off "BLACKOUT" indicator, through BANK ↑ or BANK ↓ key to select the program (BANK), then press the "SCENES" following the number keys to select the scene to inspect .
12.4 Modifying a program
(1) Press the "PROGRAM" button for two seconds to enter programming mode, press off "BLACKOUT" indicator.
(2) BANK ↑ or BANK ↓ keys to select the program you want to edit.
(3) Click "SCANNERS" following the number keys to select the lamps.
(4) to promote the channel fader to adjust the settings.
(5) Press "MIDI / REC" ready to save.
(6) Finally, click "SCENES" following the number keys to save the edited program.
12.5 Copy copying program
(1) Press the "PROGRAM" button for two seconds to enter programming mode, press off "BLACKOUT" indicator.
(2) BANK ↑ or BANK ↓ key to select the program to be copied (BANK).
(3) Press the "MIDI / REC" ready to copy.
(4) BANK ↑ or BANK ↓ key to select will be copied to the local (target program).
(5) Click "MUSIC BANK COPY" button to complete the copy process, all the lights will flash it.
13. CHASE (chase)
CHASE (chase) is a different procedure (BANK) sequence of the program to be called one by one to form the CHASE (chase). This console can edit the 6 groups CHASE, each step can be up to 240 King.
13.1 Editing a CHASE (chase)
(1) Press the "PROGRAM" button for two seconds to enter programming mode, press off "BLACKOUT" indicator.
(2) on the panel by pressing the "CHASE" button (1-6) to select to edit the CHASE (chase).
(3) BANK ↑ or BANK ↓ key to select BANK (program).
(4) Press the "SCENES" under the number keys to select View (SCENE).
(5) Press "MIDI / REC" button to save.
(6) Repeat steps 3 through 5, until the completion of the current CHASE (chase) the editor.
(7) Finally press the "PROGRAM" key for two seconds to save the current editor of the CHASE, exit the program.
13.2 Run CHASE (chase)
(1) Press to run CHASE.
(2) Press "AUTO DEL" key to "AUTO" indicator light.
(3) Press the "TAP DISPLAY" key twice to set CHASE (chase) the speed of operation. Can also promote the "SPEED" and "FADE TIME" potentiometer to set the CHASE (chase) the speed of operation.
13.3 Check the CHASE (chase)
(1) Press the "PROGRAM" button for two seconds to enter programming mode, press off "BLACKOUT" indicator.
(2) Press the panel button to select the check CHASE CHASE.
(3) Click "TAP DISPLAY" key to display the information in the CHASE.
(4) or by BANK ↑ CHASE BANK ↓ keys to view each of the step.
13.4 A copy of the BANK (program) to the CHASE (chase) in the
(1) Press the "PROGRAM" button for two seconds to enter programming mode, press off "BLACKOUT" indicator.
(2) Select the CHASE, CHASE corresponding indicator light.
(3) BANK ↑ or BANK ↓ keys to select the copy of the BANK.
(4) Press "MUSIC BANK COPY" button, ready to copy.
(5) Press "MIDI / REC" button to complete the copy of the BANK, all lights will flash it.
13.5 copies of a SCENE (King) to the CHASE (chase) in the
(1) Press the "PROGRAM" button for two seconds to enter programming mode, press off "BLACKOUT" indicator.
(2) Select the CHASE, CHASE corresponding indicator light.
(3) Select the copy SCENE (scene) where the BANK.
(4) SCENES following number keys to select the copy of the SCENE.
(5) Press the "MIDI / REC" button to complete the King's copy, all the lights will flash it.
13.6 CHASE (chase) to insert a SCENE (King)
(1) Press the "PROGRAM" button for two seconds to enter programming mode, press off "BLACKOUT" indicator.
(2) Select the CHASE, CHASE corresponding indicator light.
(3) Click "TAP DISPLAY" key to display the information in the CHASE.
(4) and then press the BANK ↑ or BANK ↓ keys to select (for example, to step in step 5 and 6 inserted between the step, you can use BANK ↑ or BANK ↓ keys to select the step, making the screen appear as STEP 05).
(5) and then press the MID / REC button for inserting step (when LCD display change from the STEP05 STEP06).
(6) then BANK ↑ or BANK ↓ key to select where to insert the SCENE BANK.
(7) and then SCENES number keys to select the following to insert the SCENE.
(8) and then press the MIDI / REC button to complete the SCENE (King) of the insert operation, all lights will flash it.
Remove a 13.7 in the CHASE SCENE (King)
(1) Press the "PROGRAM" button for two seconds to enter programming mode, press off "BLACKOUT" indicator.
(2) select the SCENE you want to delete the CHASE, CHASE corresponding indicator light.
(3) Click "TAP DISPLAY" key to display the information in the CHASE.
(4) BANK ↑ BANK ↓ keys to select or remove that step SCENE (King).
(5) Press "AUTO / DEL" to delete all lights will flash it.
13.8 Deleting a CHASE (chase)
(1) Press the "PROGRAM" button for two seconds to enter programming mode, press off "BLACKOUT" indicator.
(2) Option to delete CHASE, CHASE corresponding indicator light.
(3), first press the "AUTO / DEL" key, then press the corresponding button to complete the removal CHASE CHASE operation, all lights will flash it.
Remove all CHASE 13.9
(1) Turn off the power control units.
(2) and then press the "AUTO / DEL" key and hold BANK ↓ key to open the console remove the power to complete all CHASE
Operation, all lights will flash it.
-
14. SCENE (scene)
14.1 copies of a SCENE (scene) to another in the BANK
(1) Press the "PROGRAM" button for two seconds to enter programming mode, press off "BLACKOUT" indicator.
(2) BANK ↑ or BANK ↓ key to select where to copy SCENE BANK.
(3) Click SCENES to select the number below to copy the SCENE.
(4) Press the "MIDI / REC" button, ready to copy.
(5) and then through BANK ↑ or BANK ↓ keys to select the target to be copied to BANK.
(6) in the target BANK, press the number keys to determine SCENES copy the following to the place where all light is flashing it.
14.2 Deleting a SCENE (scene)
(1) Press the "PROGRAM" button for two seconds to enter programming mode, press off "BLACKOUT" indicator.
(2) BANK ↑ or BANK ↓ key to select where you want to delete the SCENE BANK.
(3) Press the "AUTO DEL" key down.
(4) Press the corresponding number key SCENES below to complete the SCENE (King) is deleted, all the lights flashing it. SCENE deleted all channels in the 240 to 0 will be eliminated.
14.3 Remove all of the SCENE (SCENE)
(1) Turn off the power control units.
(2) Press the PROGRAM button and BANK ↓ key, open the console power supply, to complete a full SCENES (King) is deleted, all the lights will flash it.
15. Voice
(1) Press "MUSIC BANK COPY" button, the panel "MUSIC" light flashes. When the console receives a sound signal, it will work in voice mode.
(2) BANK ↑ or BANK ↓ keys to select the voice of the BANK.
(3) "FADE TIME" potentiometer adjustment sliding time.
(4) Press the key to a CHASE, CHASE will become a voice in this mode, you can select multiple CHASE-by-run. And through the "FADE TIME" potentiometer adjustment sliding time.
16. Automatic mode
(1) Press "AUTO DEL" key, so that "AUTO" indicator lights.
(2) If you do not choose CHASE, will automatically run the currently selected BANK, you can also BANK ↑ or BANK ↓ key to re-select BANK.
(3) pressing a key CHASE, CHASE, this will run automatically, you can also select multiple CHASE.
(4) you can "SPEED" potentiometer adjustment step and the time between steps, and then use "FADE TIME" potentiometer adjustment sliding time.
17. MIDI Operation
(1) Press the "MIDI / REC" key for two seconds.
(2) BANK ↑ or BANK ↓ key to select the MIDI channel.
(3) press the "MIDI / REC" button to save your settings.
18. The data transfer
Will have been programmed in the control station and another DMX output DMX input control stations are connected, you can transfer data between the two.
18.1 send data
(1) programmed in the console off.
(2) Press SCANNERS following 2 and 3 keys, and then SCENES following a key, hold down the three.
(3) And open the console power, the screen will display "TRANSMIT", expressed its readiness to transmit data.
18.2 Receive Data
(1) off the other console.
(2) Press SCANNERS 8 and 9, the following key, and then SCENES following 2 key while holding down three
(3) and open the console power, the screen will display "RECEIVE", expressed its readiness to receive data.
18.3 Data transmission
(1) When both are ready, press the button SCENES 7 and 8 the following key down.
(2) Data transfer started.
(3) To send after the console will automatically return to manual mode.


Новинки товаров от производителей по оптовым ценам